Best VPN App
Great Features with
Best VPN.
No need to install various VPN Apps.
Hexo VPN is enough for everything.
Best VPN App
Great Features with
Best VPN.
Free connection to large number of servers
Without any restriction
Best VPN App
Great Features with
Best VPN.
Support for Netflix, HBO, Hulu and popular
Movie streaming platforms guaranteed
HAVE PROBLEM WORKING WITH APP ?
How to use HEXO VPN
Using VPN
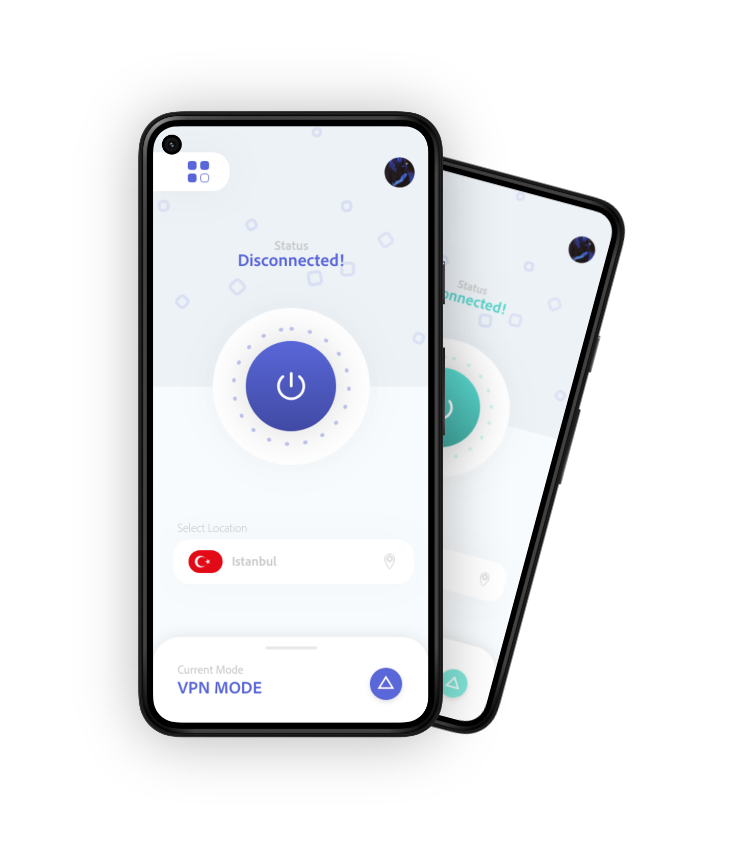
For using VPN you can download app from Google Play Store and after the app has downloaded you can launch it from launcher and you will see a screen just like the image, so the points that are clear in image is the server is set to Best Location which means app will select a server for you and at the bottom of the screen you can see a panel (or we call it a panel btw) which is usefull for more advanced features that i will describe in below. if you want a fast and furios connection just tap the "Start" button and in most cases it will connect if your not in a highly restricted country, but if it fails then continue reading the thread :)
Selecting Server
We encourage our users to select the servers which works best for them and it's so easy, to change the server to your desired location just tap the "Best Location" section from previous part and you will see a new screen just like the image which you can select a server manually, performance and speed of the server is dependent on your plan and network condition so consider it when choosing server, if you have a Premium plan then you can select our Premium servers which are High Performance and Fast enough but if your a free user don't worry you can still select from large number of free servers.
Selecting Protocol
We highly recommend changing protocols if you have problems connecting our servers, in highly restricted countries it's hard to connect with default protocol and you have to change the protocol on order to connect, for changing protocol please open settings (tap the for rectangle shaped button which you can find in top left of the main screen of vpn app and select settings) and then tap "Protocol"
- continue in below
Continue "Selecting Protocol"
You will see a sheet like the image and the default protocol for the app is set to "IKEv2" which is a fast protocol but it might be blocked in the country that your living if you can't connect to servers, then select "OPENVPN" protocol which works best for most of restricted countries and try it connect with it by using the first section of our tutorial which covers how to connect.
How to use DNS
Hexo VPN is not just a VPN although we keep calling it VPN somehow but you can take advantage of its DNS Switcher, so let me start by telling you what DNS is, so DNS stands for "Domain Name System" which translates the Domain Names to IP just like when you browse www.google.com in your browser, your network ISP (Internet Service Provider) will send your request to a DNS Servers which finds a match for your request and when it founds it, you will be redirected to their website.
So changing DNS is more common between Gamers that wants better ping and connection routing and we integrated it in our app, you can active our DNS switcher by tapping button in bottom right of the screen which is clear in the image and tap "Switch to DNS"
- continue in below
Continue "How to use DNS"
And then your world changes (i mean color of the app :D ) and that color means your in DNS mode to switch back to VPN mode you can tap the same button.
Now you might think what happened, so now all of your internet request will go to the our default DNS Server which is "Cloudflare DNS" and the reason we choosed Cloudflare as our default DNS Server is that they have most of the edge servers in world wide which gives you better ping and connection, but don't worry you can still change it that i will tell you how in next section.
Selecting DNS Server
To change your DNS Server just tap the "Selecting Server" which shows your VPN Server currently "Amsterdam" from previous section and you will see a screen like the image which shows DNS Servers, as i said the default server is set to Cloudflare and you can choose any of those servers
Wait, It's not enough ?
don't worry you can still add your favorite server that you only know :P and i will tell you how in next section.
Add DNS Server
Here you go, you can add DNS Server you want and connect to it, to add new DNS Server just tap the "+" or Plus button which is in top right of the screen in the previous image and a sheet should appear just like the image, you can fill the "Name" with anything you like (yeah you can choose Blablabla for it as well :D ) but for IP / Host you have to add your desired DNS Server Primary IP Address or Hostname and for the "Secondary IP / Host" you have to add....... the same thing but the secondary one and for the last field which is filled with "53" you have to set the "PORT" and it's default value is 53 so we filled it but you can change it as well and then tap on "Done" if you don't want to make it default server.